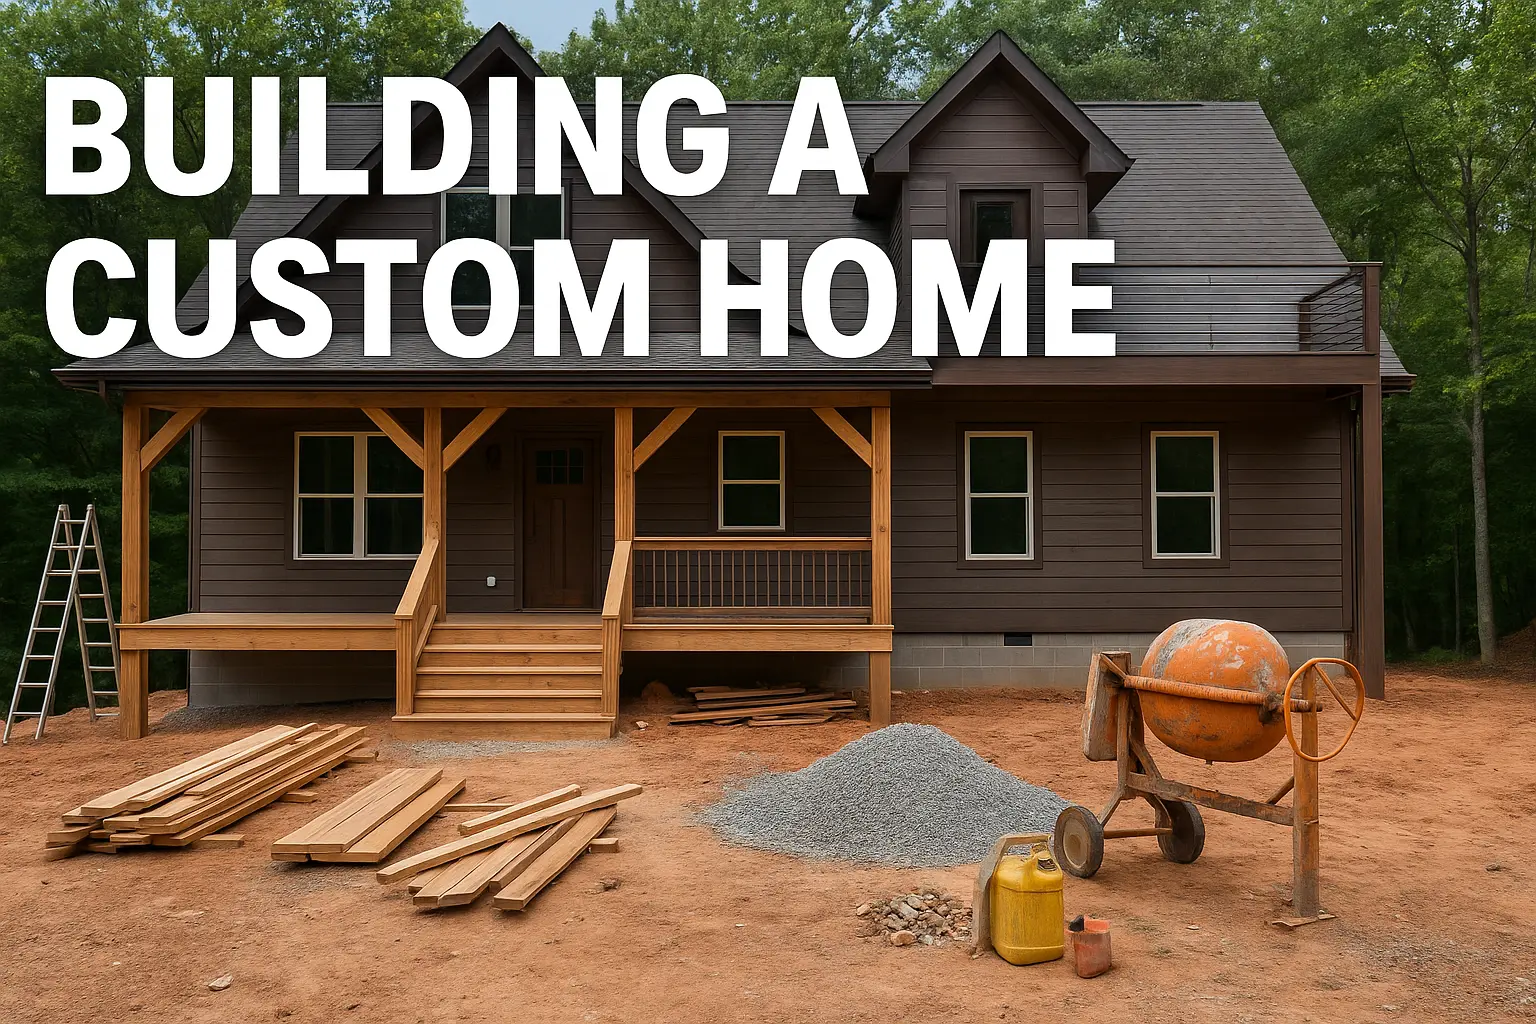
In this article, we are going to go through all the steps of building a custom home here in the mountains of Western North Carolina. It’s about a 2,000 square foot home on a full basement.
We started this basement foundation by pinning the four corners with stakes. Then we pulled string lines between those so that we could trace the outline on the ground with some spray paint. These spray-painted lines are what we followed with the excavator bucket to dig the footings.
As we dug the footing, we used a laser level and a reader to make sure that the bottom of the footing was flat and at least one foot below grade, down to the bottom of the footing below frost line, which is code here.
This ridge line was just barely wide enough for the house, and some of the post footings on the right had to go way down to hit original soil through some fill dirt that was pushed out when this site was made.
One of the reasons people want to move to this area is the amazing views. Here, we’re looking at about ten thousand acres of the Nantahala National Forest right out the front.
Digging the Footings and Rebar Setup
Contents
- 1 Digging the Footings and Rebar Setup
- 2 Block Foundation and Basement Walls
- 3 Plumbing and Gravel Preparation
- 4 Pouring the Slab and Wall
- 5 Framing the Custom Home
- 6 Floor System and Subfloor Installation
- 7 Exterior Wall Framing and Balloon Wall Construction
- 8 Waterproofing and French Drain Installation
- 9 Custom Roof Construction
- 10 Roof Sheathing and Exterior Sheathing
- 11 Interior Wall Framing and Stairs
- 12 Exterior Finishing and Windows
- 13 Decking and Cable Rail System
- 14 Drywall, Priming, and Painting
- 15 Vaulted Ceilings and Tongue & Groove Finish
- 16 Fireplace and Tile Work
- 17 Flooring Installation
- 18 Window Trims and Cabinet Installation
- 19 Stairs, Doors, and Railings
- 20 Custom Rustic Railings
- 21 Showers and Tile Details
- 22 Hardware, Cabinets, and Appliances
- 23 Certificate of Occupancy and Countertops
- 24 Final Touches and Walkthrough
- 25 Table: Key Stages of Building a Custom Home
Our next step after digging the footings was to do the steel work that would reinforce the footings and help tie the basement wall to the footing.
For this particular foundation, we used number five rebar, which is five-eighths of an inch thick and comes in 20-foot-long sticks. We installed two rows of rebar horizontally, sitting on rebar chairs, which hold them out of the dirt so they don’t rust.
Since the slab in this basement will have drain lines run under it, we had to put in a sewer sleeve underneath the footing to make sure that we have a way for sewage to get out of the house.
Next, we installed J-bars, which are pieces of rebar bent at 90 degrees. They help tie the footing to the foundation wall. After a foundation inspection, we were ready to pour concrete.
For this footing, we used a concrete pumper because we couldn’t get the concrete truck close enough to the footings to pour the concrete in. We wanted to make sure that the concrete was level on top for our block foundation, so we filled it up until we reached the top of our grade pegs, which we also set with our laser level, ensuring they were perfectly even.
Block Foundation and Basement Walls
Once the concrete had cured enough to stand on, we set up our lead poles. These helped us build the block wall faster because we could hook our lead lines to these without having to build block corners first.
We were then ready to start mixing our S-type mortar and begin laying block. Hooking our string lines to the lead poles gave us a nice straight and level reference to lay the corner of each course of block.
Since our block was delivered to the upper level of the site and needed to get down to the bottom, we set up a board and used it as a slide for the blocks. This worked really well.
This basement wall would be a total of 14 courses high, giving us a clear space of 8 feet 8 inches inside from the slab to the ceiling, and 9 feet 4 inches from the footing to the top of the wall.
The courses of block in this basement wall would be filled solid with concrete. To give it even more strength, we added steel vertically and horizontally every two feet like gridwork, so when it’s poured, it’s all steel reinforced.
By the time our block work was finished, we were about six working days into the project, and it was already looking great.
Plumbing and Gravel Preparation
Our next step was to install the plumbing drain lines underneath the slab. Since our mini excavator was no longer on site, we had to do this trenching by hand.
These trenches were sloped at about a quarter inch per foot, which is a good slope to make sure that everything drains properly. We also added a PVC sleeve that would be the inlet for the water line coming into this basement.
After another plumbing inspection, we were able to cover it up and move on to the next step.
Next, we needed to move 20 tons of gravel from the upper level down to the basement. It’s code to have four inches of washed stone underneath a basement slab like this in our area.
We didn’t want to do this by hand, so we rented a track skid steer. Driving this machine was much easier and more fun than pushing a wheelbarrow.
Once we had all the gravel in and leveled, we had to dig out a few spots to make the slab thicker in areas that would be load-bearing for the future framing.
We also put a parge coat of S-type mortar around the entire backside of the basement. This would aid in waterproofing and also improve the look of the wall.
Then we dropped in number five rebar every two feet on center around the entire wall to prepare for pouring the wall.
Finally, before the concrete arrived again, we added a six-mil vapor barrier on top of the gravel to help keep moisture from rising from the ground into the slab.
With that, we were ready to pour the slab and wall.
Pouring the Slab and Wall
We poured the wall first so we wouldn’t splatter concrete onto our slab from the wall. We again used grade pins and screeded between them to get everything nice and level.
Finishing the concrete into a smooth slab is a several-stage process. We started with hand trowels and knee boards to get out on the concrete before it cured enough for a machine. Then we used a power trowel, which is a set of trowels attached to a gas motor (like an upside-down helicopter) that makes finishing much easier than doing it by hand.
This was the first of many passes until we slicked it down to a final finish.
After letting the concrete cure for just a couple of days, we started bolting our mud sill to the top of the wall. The framing would attach to this.
On the basement level, we began framing the walls that matched the height of our block walls around the rest of the exterior of the home that wasn’t below grade.
Framing the Custom Home
As with any framing that touches concrete, the bottom plate of this wall was made out of pressure-treated wood.
We used box-style headers for over the windows and doors. These were yellow pine 2x12s with 2x6s top and bottom. We waited to add the inside layer until we could insulate the header.
Before framing any interior walls, we cut some control joints in the slab. This gave a weakened point in the slab that was straight, because concrete will eventually crack over time, and it looks much better if it cracks in a straight line.
Next, we started framing our interior walls. Something interesting about framing on a slab like this is that slabs are not perfectly flat; they have a little up and down. To account for that, we pulled a string line across the top plates and measured down to the slab at each stud location, cutting each stud to length accordingly—especially for walls that would bear the floor load above.
We also tried to make sure that the stud layout matched the floor joist layout on the next level. After adding diagonal bracing to lock the walls plumb and straight, and fine-tuning with a planer to ensure the tops were flat, we were ready to lay out for our floor system.
Floor System and Subfloor Installation
This floor system was built with 2×12 yellow pine joists, set 16 inches on center with all crowns facing up. We installed all the common joists and then came back to add the band boards, plumbing each end of the joists as we nailed them.
With a little daylight left, we decided to install wall sheathing on the exterior of the basement walls. We used ZIP System wall sheathing, which has a built-in moisture barrier, eliminating the need for house wrap.
An advantage of building a floor system out of solid yellow pine like this, compared to floor trusses, is that it usually costs less and doesn’t make the house as tall. Floor trusses are often 2 feet tall, while this solid framing was 1 foot.
With the floor framing complete, we could begin installing our subfloor. We used AdvanTech X-Factor subflooring, which has an extra yellow layer that helps it shed water. That’s important because subfloor sits in the rain until a roof is installed.
Exterior Wall Framing and Balloon Wall Construction
We then laid out our top and bottom plates for the main floor exterior walls. As we set the studs down, we made sure all crowns were up in the same direction. This helps ensure straighter, truer walls.
We decided to build the tallest gable wall in one piece, all the way up to the ridge. This technique is called balloon framing, meaning you skip the floor system and frame it all in one piece. It’s stronger but more challenging.
It was tough to lift—we weren’t even sure if we could—but with extra hands, we got it up, plumbed, and braced. That was one of the scariest parts of this project, but once done, we could move on.
Next, we framed the decks. We plumbed all the porch posts, which were ground-contact-rated pressure-treated posts, specially treated to prevent rotting even when touching dirt.
With deck framing done and temporary decking laid, we could reach the future front door of the house. Then we closed off the end of the house with another exterior wall.
Waterproofing and French Drain Installation
Before backfilling, we applied Bituthene 3000 waterproofing membrane on top of the block wall and added a French drain around the entire basement perimeter at the footing.
We brought a machine back on site to spread gravel on top of the French drain. Using sheet goods, we directed gravel over the perforated pipe. Then we added filter fabric to prevent sediment buildup in the gravel, which would otherwise block water from draining.
Our building inspector checked the French drain and waterproofing, and once approved, we could backfill the basement.
With the pit around the house filled, we began stocking material for the next floor. This floor didn’t cover the entire first floor, leaving a vaulted ceiling over the kitchen and living room—a beautiful feature for this mountain home.
Custom Roof Construction
Now came one of the most exciting stages: building the roof.
This roof had a 12-pitch, meaning 12 inches of rise for every 12 inches of run (a 45-degree angle). It was steep. The ridge was a load-bearing ridge, supported at each end and in the middle, creating a vaulted upstairs loft with about a 14-foot peak in the center.
Once the LVL ridge was set, we installed rafters every 10 feet down the ridge to brace it straight. Then we added the intermediate rafters. These were 20-foot-long 2×12 yellow pine boards—very heavy.
We also built one upstairs exterior wall for a shed dormer, which provided full-height walls all the way to the edge.
With the main roof framing complete, we started building the porch roofs. Some girders needed support from exterior walls, so we notched them in. After setting the low girders, we scaffolded up to install the ridge beam and porch rafters, much like we did for the main roofline.
Roof Sheathing and Exterior Sheathing
Before roof sheathing, we finished wall sheathing for added strength. Sheathing braces the walls diagonally and prevents sway, especially before the roof is locked in.
We installed the wall panels horizontally, though they can also be installed vertically to reduce blocking.
Next, we installed pre-assembled fly rafters built like ladders. These created overhangs on the gable ends and provided a base for fascia boards.
With fascia boards in place, we began roof sheathing. Because we didn’t have enough walk plank brackets for every side at once, we moved them around as each section was completed.
On the porch posts, we notched the tops so girders could sit securely, with posts attaching to the sides for both upward and downward support.
The side porch had a 4/12 pitch shed roof. We first installed ceiling joists to stand on, then lapped rafters over the higher roofline. The rafters attached to the side of ceiling joists and crossed the girder corners with no bird’s-mouth cut.
Just like with wall sheathing, we sealed the roof system by taping panel joints with ZIP tape, made by the same manufacturer. This method is faster than roofing underlayment and keeps the roof about 99% dry until shingles go on.
Interior Wall Framing and Stairs
With a roof over our heads, it was time to finish the interior walls that would be framed up to the sloped ceiling. These took longer because of the angles.
We also framed the stairs, which ran from the basement level to the third level. That was a two-to-three-day project on its own.
Before moving to finished materials, we helped the plumber bury the sewer line that ran out to the septic tank and leech field down the mountain.
Exterior Finishing and Windows
For the exterior finish, we started with soffits and fascias. This way, we wouldn’t risk breaking windows while installing trim. We could also brace out of the windows to set walk boards, making the process easier.
We used pre-finished LP SmartSide Expert Finish materials, which required no painting after installation. The windows were vinyl-frame horizontal sliders—chosen because they were more affordable than other options.
Windows can be very expensive. These cost around ten thousand dollars, but wood-clad versions could easily run thirty to fifty thousand.
As new-construction windows, they were nailed in using the vinyl flange and roofing nails. We sealed them with ZIP tape as flashing.
We also used HydroGap drainable house wrap, which leaves a space behind siding using rubber nodules. This allows any trapped water to drain out.
The siding itself was LP SmartSide Expert Finish lap siding with a six-and-a-half-inch reveal, blind-nailed, except on dormers and gable ends where we installed shake panels.
Decking and Cable Rail System
Once scaffolding work was mostly done, we installed the decking. This was Trex composite in a saddle color, installed with hidden fasteners that lock into grooves on the board edges. This gave a clean look.
It was my first time using hidden fasteners, and I thought they’d slow us down, but they were actually faster than face-screwing—and looked much better.
Next, we installed a massive 6×6 collar tie across the front porch roof. This provided tension support to keep the roof from sagging or spreading.
In preparation for stainless steel cable rails, we installed all wood railing parts first and stained them, avoiding the hassle of staining around cables later.
With the framework ready, we installed cables using a professional stainless steel cable system. Once the cables and roof were complete, the exterior of the house was finished and looked amazing.
Drywall, Priming, and Painting
Next, we prepped the inside. We added blocking for cabinets and fixtures, built the front steps, and installed railings.
With the exterior wrapped up, plumbers, electricians, HVAC crews, and insulators could finish their work. We also handled small tasks at home before moving on.
Drywall hanging and finishing was subcontracted. Afterward, we cleaned everything because we were the paint crew, and we wanted a clean surface for spraying.
We masked off windows and surfaces we didn’t want primer on. Proper prep is crucial—rolling edges like gaskets and stapling everything prevents overspray leaks.
Once prepped, we used an airless sprayer to apply primer to walls and ceilings. After primer dried, we sanded the walls smooth to remove rough spots.
We then sprayed flat white paint on ceilings and brushed two coats of color on walls. Fun colors made the process satisfying—unlike white over white primer, which feels unproductive. The result was fantastic.
Vaulted Ceilings and Tongue & Groove Finish
All vaulted ceilings were finished with 1×8 tongue-and-groove pine boards. We pre-finished the boards in the shop before installation.
Above the tongue and groove, we installed house wrap to stop air movement into insulation through small cracks.
Fireplace and Tile Work
Before wood floors, we completed masonry tasks—fireplace and tile.
For the fireplace, we used locally sourced natural stones for the hearth. For the rest, we used Evolve Stone, a manufactured product cuttable with standard tools. It attaches to plywood with a finish gun.
Pro tip: paint plywood black behind Evolve Stone to reduce visibility of cracks.
Tile work began with installing backer board—half-inch on walls to match drywall, quarter-inch on floors for a standard three-quarter-inch flooring depth.
For cutting tile, we used two tools:
- A wet saw with a diamond blade and water cooling.
- A snapper tool, which scores tile and snaps it clean.
Flooring Installation
With messy work done, we installed engineered wood flooring. Engineered floors are plywood layers topped with real wood veneer.
We glued and stapled the boards down. Glue acted as a vapor barrier, applied with a notched trowel.
One favorite tool was the flooring jack, used to tighten the last boards where the big nail gun couldn’t reach near walls.
Window Trims and Cabinet Installation
We custom-made window trims as one-piece units, including jambs, pocket-screwed together for strength. This eliminated excessive nails on face trims.
With pre-built units, we installed all window trims in one day.
Next, we installed kitchen, vanity, and basement wet bar cabinets. These were custom quarter-sawn oak cabinets.
We used special cabinet clamps to align and secure face frames flush, making attachment precise.
For the island, we laid out positions with masking tape, attached floor cleats through hardwood, then secured cabinets to them.
Stairs, Doors, and Railings
Another major task in finishing this home was installing stair treads, risers, and skirt boards.
We used adhesive to glue the stair treads down, then face-nailed and filled nail heads. Using adhesive is critical—without it, stairs will squeak in the future.
We bought stock yellow pine treads and risers, which were inexpensive compared to hardwood like oak. They are softer, but cost-effective.
For the basement, we installed luxury vinyl plank (LVP) flooring. LVP is water-resistant, scratch-resistant, and a great option for basements.
We also installed six-panel pine interior doors. These pre-hung doors cost about $150 each. After fitting the jambs, we removed the doors to prep them for stain.
We stained them with a color called “Special Walnut,” then applied two coats of water-based polyurethane, sanding between coats.
Custom Rustic Railings
For the loft, we built rustic custom railings out of 4×10 timbers and 5/8-inch rebar.
We cleaned the rebar with denatured alcohol, then applied spray-on satin polyurethane for a polished finish.
After assembling rail sections, we cut them to final length. In the shop, we fabricated custom metal brackets for attaching the rails securely while giving a rustic look.
Once brackets and rails were complete, installation was quick and satisfying.
We also built custom metal handrails for the stairwells, painted them black, sealed with clear polyurethane, and installed them.
Showers and Tile Details
This home included three tile showers, which we tiled ourselves. One shower featured an intricate creekstone inlay, which was challenging but turned out beautifully.
Hardware, Cabinets, and Appliances
We installed hardware on all kitchen and bath cabinets. This was delicate work—drilling into expensive cabinets requires precision.
We also installed a pull-out system in a blind kitchen cabinet to maximize storage space.
Next came appliance installation. We prefer to install appliances ourselves, especially microwaves, to protect surrounding finishes.
We also unpacked and stacked the washer and dryer.
Certificate of Occupancy and Countertops
At this stage, we were able to get a temporary certificate of occupancy (CO). Inspectors check for safety issues like live wires. This allowed the power company to connect permanent power.
Countertops were one of the final installations. We used granite countertops, installed with special carts and bracing systems to prevent breakage in thin sections like sink cutouts.
Final Touches and Walkthrough
We painted all exterior doors to match trim. We installed ground cover, which banks require before final payments.
We also cleaned every window inside and out—time-consuming, but necessary.
This home included propane appliances, so we contracted with a propane company to bury a tank and run supply lines.
We installed a decorative door knocker, touched up paint, installed light bulbs, and cleared tools and debris from the site.
Finally, after months of work, the house was complete. It had 2,000 square feet of heated space, plus storage and mechanical areas, two bedrooms, three and a half baths, and a loft.
Table: Key Stages of Building a Custom Home
| Stage | Description |
|---|---|
| Foundation Layout | Staking, excavation, footing prep |
| Footings & Rebar | Reinforcement, steel setup |
| Concrete & Block Walls | Pouring and stacking, 14 courses high |
| Plumbing & Gravel | Sewer sleeves, trenching, gravel fill |
| Basement Slab | Vapor barrier, slab pouring |
| Framing & Subfloor | Stud walls, joists, subfloor |
| Roof Construction | Ridge beam, rafters, sheathing |
| Waterproofing & Backfill | French drain, membranes, fill |
| Exterior & Decking | Siding, windows, composite decking |
| Interior Work | Drywall, paint, tile, flooring, cabinets |
| Stairs & Railings | Pine treads, rustic railings, rebar finish |
| Appliances & Countertops | Cabinets, granite countertops, appliances |
| Final Touches | Doors, propane, landscaping, walkthrough |